Welcome to Part 3 of Camping Merit Badge. If you need to back to Part 1 or Part 2 of merit badge, please use the horizontal bar below and click on respective part
Requirement #6
6a) Describe the features of four types of tents, when and where they could be used, and how to care for tents. Working with another Scout, pitch a tent.
The 4 main types of tents are: A-Frame, Dome, Hoop and Pyramid Tents.
A-frame tent
An A-frame tents resemble an “A” with a wide base and sides that slope in. They are usually fairly cheap and easy to set up, offering ample ground space but not a lot of headroom. Many troops use them as they are cheap and have less parts that could break or be lost as compared to other tents

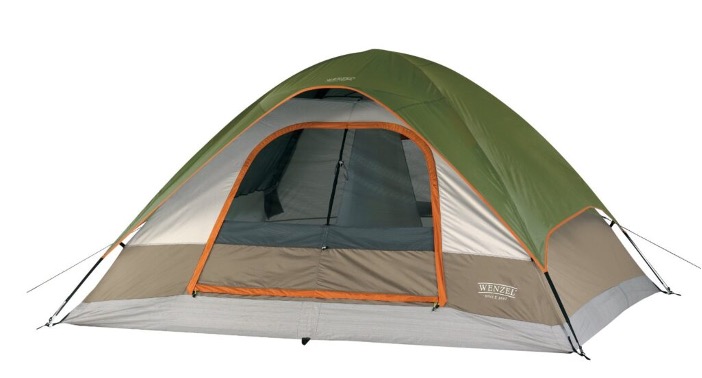
Dome Tent
Dome tents are made up of multiple curved poles that form a semi-circular shell. They combine to give a large floor plan as well as lots of headroom. They can usually be set up easily and there are even some “instant” dome tents that don’t require you to assemble any poles. I personally use one of these and it has served me well for many years. While I can’t find the exact tent I use, if I was buying a new tent today, I would get this one.
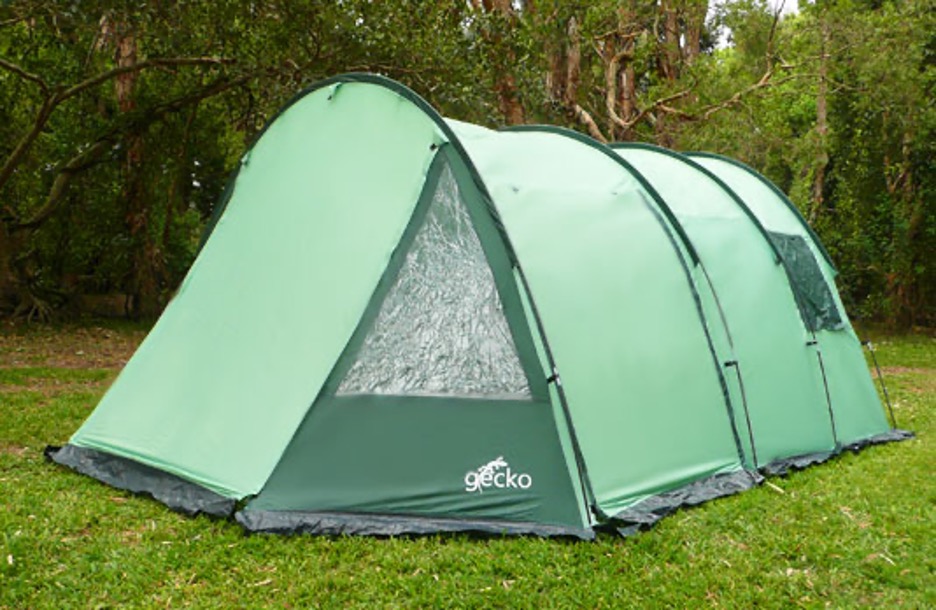
Hoop Tent
Hoop tents are made up of numerous circular poles that form a cylindrical body of the tent. These tents are less popular in Scouting as they are generally made for 6 or more people and can be rather difficult to set up.
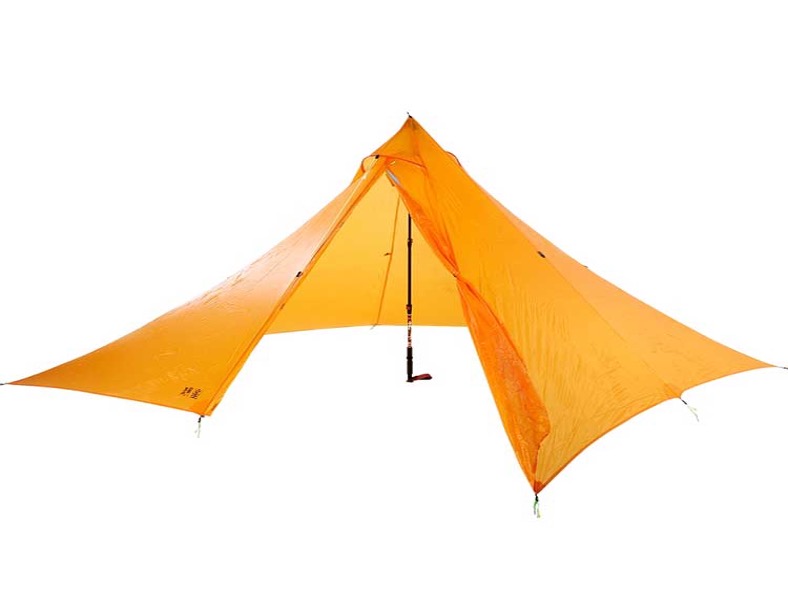
Pyramid Tent
Pyramid tents are the most basic tent. They are made up of a single pole in the center with fabric draped over it and pulled taught on the edges. They are generally the smallest of all tents and not used too much in Scouting. They can however be useful for backpacking or other activities that require you to carry your tent with you as they are very light and small.
Caring for your tent is also very important. Properly caring for your tent will ensure you don’t end up with holes or a broken zipper and get to enjoy your tent for many years. Follow these tips
- Never store your tent wet
- Never pit your tent on sharp rocks or sticks
- Be careful with the tent’s zippers. They are usually the first things to break
6b) Discuss the importance of camp sanitation and tell why water treatment is essential. Then demonstrate two ways to treat water.
A Scout is clean! Camp sanitation is an important part of camping. Keeping clean will keep you safe from sickness and disease. Make you abide by the Outdoor Code and principles of Leave No Trace.
Contaminated water is the most common source of sickness while camping. There are many ways to treat water and for this requirement you’ll have to demonstrate two. Some methods include:
- Boiling
- Iodine Tablets
- Filtration
Boiling is the easiest as all you need is a fire and a pot. Make sure you filter the water through something like a t-shirt as boiling won’t remove large particles. For your second method I recommend using iodine tablets as they can be obtained rather cheaply.
Also be sure you properly dispose of any wastewater. Always use eco-friendly soaps and cleaners when doing dishes and be sure to dump your wastewater at least 75ft from camp.
6c) Describe the factors to be considered in deciding where to pitch your tent.
Tents should be pitched over debris-free areas on a slight incline. By doing this, in the event of heavy rains, the water will flow away from your tent rather than pooling where you sleep. Also, avoid pitching your tent in a sensitive meadow area and instead, place it on short grass or insensitive ground. Move any branches too, as these could puncture the floor of your tent.
For your own safety, always pitch your tent with a side wall facing into the wind. Never face your tent opening into the wind. Otherwise, your tent might be blown away! Especially in heavy winds, be careful of camping under trees, as their falling branches could be dangerous and unpredictable.
6d) Tell the difference between internal- and external-frame packs. Discuss the advantages and disadvantages of each.
A good pack will help you get your gear to and from camp comfortably and efficiently. There are two main types of back packs: Internal frame and external frame. Each have their own advantages and disadvantages, so you’ll want to pick the right one for you.
External Frame
External frame back packs have, as the name suggests, a rigid external frame. This gives these backpacks a strong shell that can store a lot of gear. The frame also creates separation between your back and the pack which will help keep you cool. These packs are also generally cheaper than internal frame back packs. One disadvantage is external frame packs are bulkier which means they are more likely to get caught on branches or other obstacles when navigating difficult terrain.
Internal Frame
Internal frame back packs have of course a frame on inside of the pack. This creates a more form fitting pack that will keep your center of gravity close to you. An internal frame pack is a good choice for backpacking on difficult trails. They are generally more expensive that external frame packs and have slightly less room but will be more comfortable.
6e) Discuss the types of sleeping bags and what kind would be suitable for different conditions. Explain the proper care of your sleeping bag and how to keep it dry. Make a comfortable ground bed.
A good sleeping bag is also needed for camping. When selecting a bag, first determine what temperature rating you will need. Bring a bag that is rated for the coldest night you expect to stay in.
Then pick a bag that is the right size for you. If you are backpacking a smaller mummy style bag might best suit you as the pack up small and are light. For a longer time frame trip, a rectangular bag that lets you spread out under the covers might be best.
You will also need to take care of your sleeping bag. The key is to keep things dry. Never store your bag wet as this creates the perfect breeding ground for mold. If your sleeping bag is machine washable, I recommend washing it after each trip.
There are many different ways to make a ground bed depending on what you have available. I encourage you to be creative. Your two main objectives should be to get yourself off the ground and provide some padding and insulation. For example, you could use sticks laid next to each other to get off the ground and leaves or ferns for insulation and padding. This requirement can be a whole lot of fun so be sure to think outside the box.
Refer YouTube informative video https://youtu.be/T0nZC0QIEb0 to get further information.
Requirement #7
Prepare for an overnight campout with your patrol by doing the following:
7a) Make a checklist of personal and patrol gear that will be needed.
7b) Pack your own gear and your share of the patrol equipment and food for proper carrying. Show that your pack is right for quickly getting what is needed first, and that it has been assembled properly for comfort, weight, balance, size, and neatness.
Here’s a great example checklist for camping gear. To fulfill requirement 7a, I’d encourage you to use it for inspiration as you create your own list based on your past experience!
When packing your gear for a campout, you should always place the items you’ll need sooner, closer to the top of your bag. This way, you won’t waste time looking through your pack when you’re retrieving something you know you’ll need! Don’t worry if you’re not sure how to do this, I’ll teach you a great trick that I use.
Here’s the trick: Before packing, take the time to think through exactly what you’ll be doing as you arrive at your campsite. Close your eyes if it helps, and just walk yourself through the day of the camp. Often, this is how it’ll go:
- First, you’ll hike in
- You’ll pitch your tent
- Then, you’ll make dinner
- After that, you’ll get changed
- Finally, you might have some free time
Therefore, you should pack your bag in the following order, from top to bottom:
- You should have water and snacks near the top of your bag (for the hike)
- Below that, pack your tent supplies (for camp setup)
- Then, pack your cooking supplies (for dinner)
- Under that, pack your change of clothes
- Finally, pack whatever you’ll need during your free time at the bottom of your pack (like your Scout handbook to work on requirements).
While packing things in the order that you’ll need them is a good rule of thumb for most items, there’s one exception to keep in mind. Items that are used in emergencies should always be easily accessible from your pack, even if you don’t think you’ll need them. Here are some items that should always be kept within reach:
- A First-Aid Kit
- Water
- A Backpack Rain Cover and Rain Jacket
- Your Pocket Knife
Requirement #8
8a) Explain the safety procedures for:
- Using a propane or butane/propane stove
- Using a liquid fuel stove
- Proper storage of extra fuel
Propane and butane can be great tools for quickly and easily cooking meals without the need to start a fire. All relevant safety procedures can found from the BSA here.
8b) Using a propane or butane/propane stove
There are 4 main types of lightweight stoves. Those being white gas, cartridge, propane and butane. They each have unique and advantages and disadvantages.
- White Gas
White gas stoves are common for backpacking in North America. They use a highly distilled fuel but may have to be preheated in order to pressurize the fuel. Some modern stoves have fuel pumps which eliminates the need for preheating
- Cartridge
Cartridge stoves are the easiest to use. They use an attachable fuel cartridge that only requires you to turn a valve to turn on. They work best in warm temperatures and lose efficiency in the cold.
- Propane
Propane stoves are generally larger and not fit for backpacking. They can, however, be a good choice for larger trips where you’ll be cooking for a lot of Scouts.
- Butane
Butane stoves are less common in North America but common elsewhere. They burn hot but have to be preheated before being used.
8c) Prepare a camp menu. Explain how the menu would differ from a menu for a backpacking or float trip. Give recipes and make a food list for your patrol. Plan two breakfasts, three lunches, and two suppers. Discuss how to protect your food against bad weather, animals, and contamination.
Planning your food out ahead of time, as with all things when camping, is important. You should base your food menu based on the type of trip you’re taking. For example, on a backpacking trip you’ll want to bring lighter meals that are easier to prep whereas on a float trip you’ll have more freedom to bring complicated meals.
This website linked here has 35 great camp recipes that you can utilized in your camp menu. First plan your menu for each meal and then create a shopping list from those ingredients. Also take note of the cooking equipment you’ll need to prepare each meal.
To store food items while camping, I recommend using airtight plastic bags to protect against weather and animals. Also be sure to store raw meat products separately to avoid cross contamination.
8d) While camping in the outdoors, cook at least one breakfast, one lunch, and one dinner for your patrol from the meals you have planned for requirement 8c. At least one of those meals must be a trail meal requiring the use of a lightweight stove.
Now’s your chance to demonstrate your menu from 8c. Make sure you cook at least one meal with a lightweight stove and remember that cooking done for the cooking merit badge does not count for any other merit badge. I’d recommend checking out this Cookware + Mess Kit combo on Amazon. Being able to cook in your mess kit is a game-changer (and makes for fewer dishes to wash later)!
Requirement #9
Show experience in camping by doing the following:
9a) Camp a total of at least 20 nights at designated Scouting activities or events. One long-term camping experience of up to six consecutive nights may be applied toward this requirement. Sleep each night under the sky or in a tent you have pitched. If the camp provides a tent that has already been pitched, you need not pitch your own tent.
There’s no quick way to complete this requirement. However, Scouts who attend most of their troop’s activities should be able to easily camp for a total of 20 days within their first year and a half of Scouting. Remember, this is the fun part. Just stick with it, and you’ll get there in no time!
9b) On any of these camping experiences, you must do TWO of the following, only with proper preparation and under qualified supervision:
I) Hike up a mountain, gaining at least 1,000 vertical feet.
II) Backpack, snowshoe, or cross-country ski for at least 4 miles.
III) Take a bike trip of at least 15 miles or at least four hours.
IV) Take a nonmotorized trip on the water of at least four hours or 5 miles.
V) Plan and carry out an overnight snow camping experience.
VI) Rappel down a rappel route of 30 feet or more.
Which experience you complete for this part will depend largely on where geographically you’re camping. In you’re in the mountains, I (1) should be fairly easy to complete. I personally completed requirement I and III for my camping merit badge but this will depend largely on you.
9c) Perform a conservation project approved by the landowner or land managing agency. This can be done alone or with others.
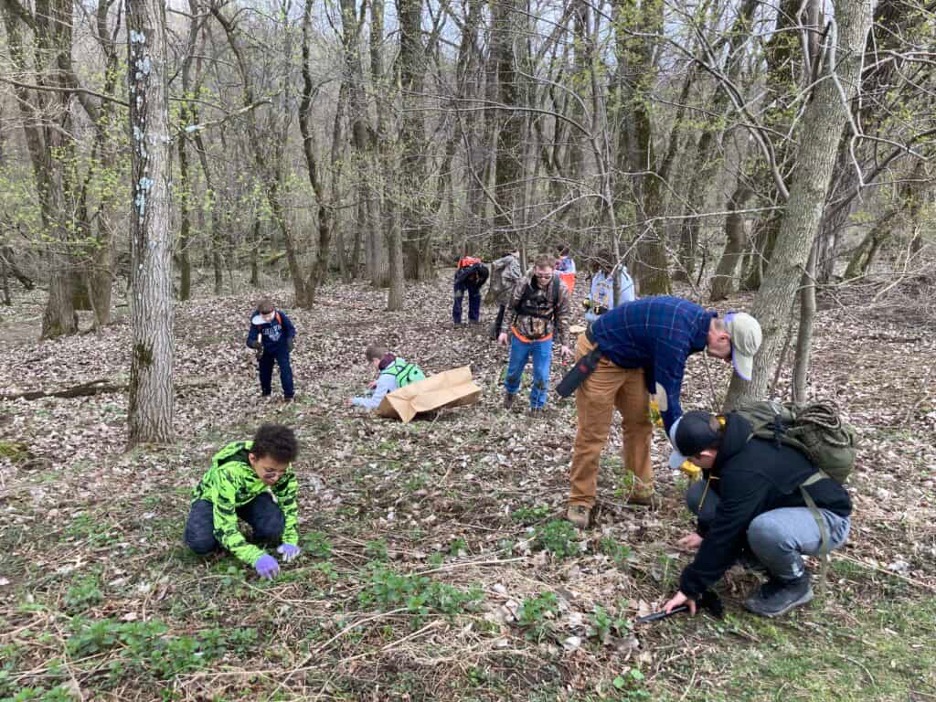
Conservation is a great way to do duty to others and your country. As Scouts, we are called to be stewards to the environment for the next generation. This will most likely be completed as a troop community service project. If you’re not rushing to complete this badge, finishing up requirement 9 will seem more like a waiting game. Eventually, your troop will take you out to do these activities, or you’ll complete them during a longer seasonal camp. With that, you’ll be set to earn your camping merit badge!
Requirement #10
Discuss how the things you did to earn this badge have taught you about personal health and safety, survival, public health, conservation, and good citizenship. In your discussion, tell how Scout spirit and the Scout Oath and Law apply to camping and outdoor ethics.
This is your time to shine! Pushing your limits and adapting on the fly while camping is a great way to develop character and sharpen your skills. Now, take a moment to reflect on your journey. Ask yourself these questions and carefully consider your answers:
- What were some of the key activities you completed while earning this badge?
- What were some of your most memorable moments during the camping trips?
- How did you demonstrate Scout spirit when overcoming outdoor challenges?
- What responsibilities do Scouts have toward the environment while camping?
- Do you find that you appreciate camping more now than when you first started?
Once you’ve completed the other requirements, take the time to have a thoughtful discussion with your counselor about each of these points. Self-reflection is a powerful tool for growth, and by looking back on your camping experiences and acknowledging everything you’ve accomplished, you’ll likely gain a deeper appreciation for all the campouts you’ve participated in and the skills you’ve developed along the way.
Conclusion
Hopefully after completing this badge, you’ll be a camping pro. Camping is a great part of Scouting but can also be a lifelong hobby. We all need a break from the hustle and bustle of daily life and an opportunity to connect with nature sometimes.
As always, wishing you the best on your Soar to Eagle! Stay focused, keep pushing forward, and remember that every step you take brings you closer to achieving your goal. Your hard work and dedication will pay off, and I’m confident you’ll make it to the top!
Pingback: Camping Merit Badge - Part 2 - Soar To Eagle
Pingback: Camping Merit Badge Guide - Part 1 - Soar To Eagle